Home
/
Blog
/

How to Succeed at What to Expect During AC Replacement, Even if You've Failed in the Past

What to Expect During AC Replacement in Wichita, KS

If you're wondering what to expect during AC replacement, here's the short answer: for most Wichita homes, the process takes one day, causes only a few hours of cooling downtime, and follows a clear set of steps from start to finish.

Quick Overview: AC Replacement Step by Step

  1. Pre-installation prep - Technicians protect flooring, clear the workspace, and review the plan with you
  2. Old system removal - Power is disconnected, refrigerant is safely recovered, and old equipment is taken out
  3. New equipment installation - Outdoor condenser, indoor coil, refrigerant lines, and electrical connections are installed
  4. System testing and commissioning - Technicians measure airflow, temperature split, and refrigerant charge
  5. Final walkthrough - You learn how to operate your new system, and warranty registration is completed

Most standard AC replacements take 4 to 8 hours. Installations involving ductwork modifications can extend to 1 to 2 days, and a full HVAC replacement (AC plus furnace) typically runs 2 to 3 days.

Replacing your air conditioner is one of the bigger home improvement decisions you'll make — especially when Wichita summers are pushing triple digits and you can't afford to get it wrong. The good news is that the process is far more organized and predictable than most homeowners expect. Yet many people still feel anxious going into installation day simply because no one walked them through what actually happens. This guide does exactly that. We'll take you through every phase of AC replacement, from clearing your home before the crew arrives to reading your commissioning report after the job is done — so you know what's normal, what to watch for, and how to make the whole experience go smoothly.

Step-by-step AC replacement timeline infographic showing prep, removal, installation, testing, and walkthrough phases

Preparing Your Home: What to Expect Before Installation Day

The key to a completely stress-free installation day starts about a week before our team even unloads the first tool. When you understand how to get your home ready, you prevent delays and ensure a safe, efficient environment for the installation technicians.

homeowner clearing space around an indoor furnace cabinet

To lay the groundwork for a successful swap, check out our comprehensive guide on How to Prepare Your Home for AC Replacement Day. Homeowners scheduling an AC Replacement Goddard KS often find that spending just 30 minutes on prep work ahead of time keeps the entire day running on schedule.

Clearing the Workspace and Securing Pets

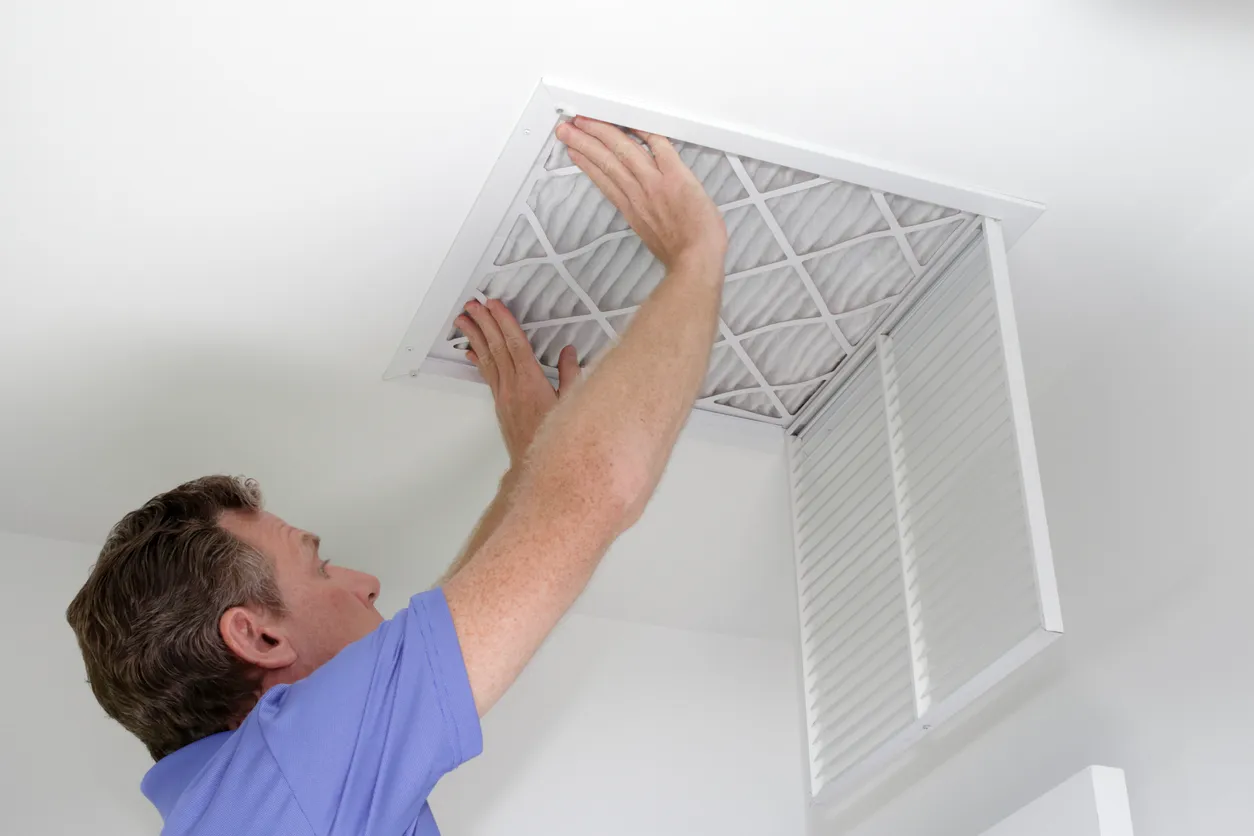
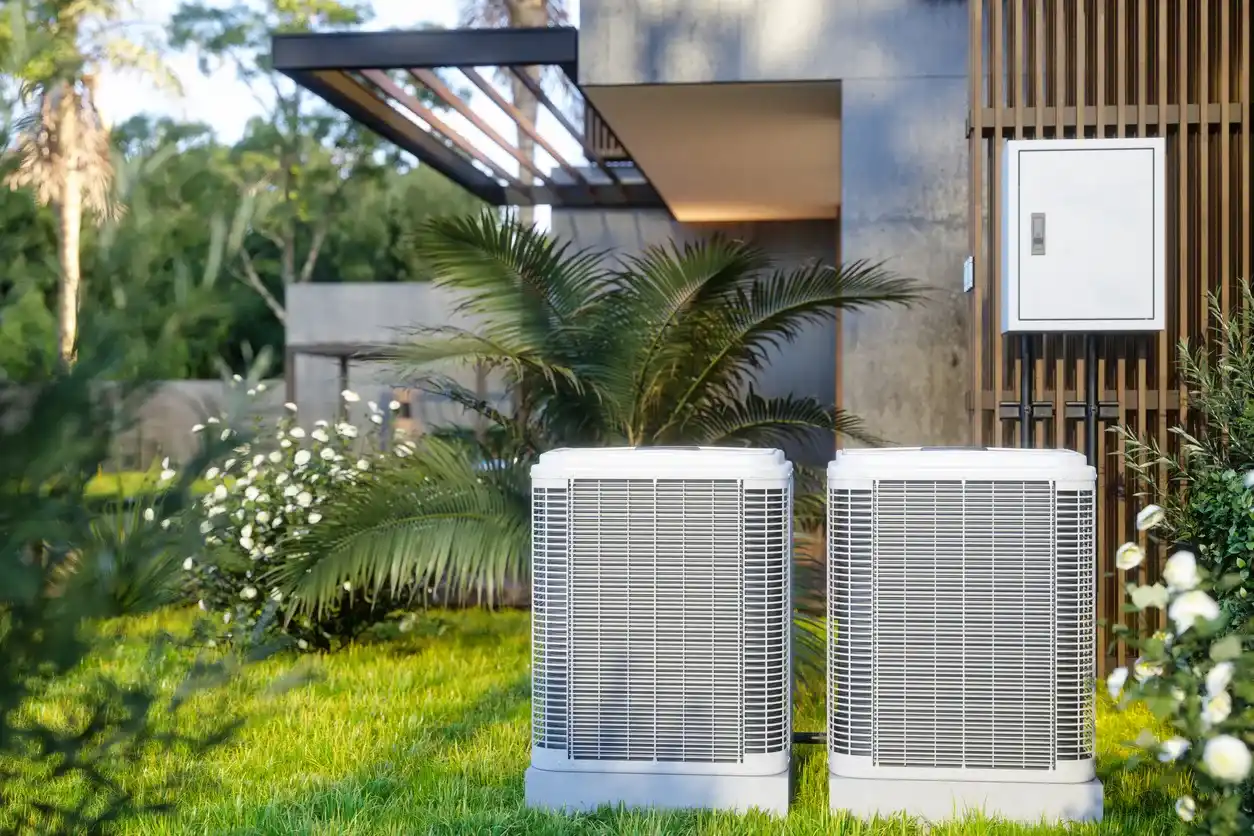
Our technicians will need continuous, unobstructed access to two main areas: your indoor air handler or furnace cabinet (typically located in a basement, utility closet, or attic) and your outdoor condenser unit.

  • Create wide pathways: Clear away any stored boxes, toys, or laundry baskets along the path from your front or back door to the indoor unit.
  • Clear the outdoor pad: Trim back any overgrown bushes, weeds, or low-hanging branches within a three-foot radius of your outdoor condenser. Move patio furniture, garden hoses, and decorative lawn ornaments out of the way.
  • Establish safety zones for pets: The constant opening and closing of exterior doors, combined with the unfamiliar sounds of power tools, can stress even the calmest pets. Keep your dogs, cats, or other animal companions secured in a quiet, closed bedroom on a different floor, or arrange for them to stay with a neighbor or at a local boarding facility for the day. This keeps them calm and prevents any accidental escapes when we are moving heavy equipment. If you are scheduling an AC Replacement Maize KS, keeping pets safe and secured is always our first recommendation.

What to Expect During AC Replacement Prep: Thermostat and Electrical Access

Before the crew arrives, make sure there is nothing blocking your main electrical breaker panel. We will need to shut off the power to both the indoor air handler and the outdoor condenser at the breakers to perform the installation safely.

Additionally, clear the wall space around your current thermostat. Modern high-efficiency cooling systems often require updated thermostats to communicate effectively with the new equipment. If you have been doing some AC Troubleshooting Tips Before Calling a Professional, you might already be familiar with how your current thermostat interacts with your system, but a full replacement is the perfect time to upgrade to a smart, programmable control system that maximizes your energy efficiency.

Step-by-Step: What to Expect During AC Replacement Day

When installation day finally arrives, a professional team will treat your home with meticulous care and cleanliness. Here is exactly what the timeline looks like from the moment the service truck pulls into your driveway.

If you are coordinating an AC Replacement Wichita KS, knowing the step-by-step technical process helps you understand what is happening in and around your home.

Removing the Old System and Recovering Refrigerant

The first major phase of the day is the teardown. However, this is not a crude "demolition" process. It requires precise, regulated technical steps.

  • Disconnecting power: The crew will verify that all electrical circuits feeding your HVAC system are safely switched off at the main breaker and the local disconnect boxes.
  • Refrigerant recovery: It is strictly illegal under EPA Section 608 regulations to vent old refrigerant (such as R-22 or R-410A) into the atmosphere. Technicians must use a specialized recovery machine and certified cylinders to safely pump out every ounce of refrigerant from your old system. This step is a critical environmental safety measure.
  • Uncoupling the units: Once the lines are clear, the technicians will cut and unbraze the copper refrigerant lines, disconnect the electrical wiring, and unbolt the indoor evaporator coil and outdoor condenser.
  • Disposal: The old heavy equipment is carefully carted away to the service truck for proper recycling and disposal. If you have been trying to figure out When to Call a Professional for AC Problems, witnessing this clean removal phase is often a huge relief, signaling that your home's cooling troubles are finally being permanently resolved.

Installing the New Equipment, Lines, and Connections

With the old unit out of the way, the installation of your brand-new system begins.

  • Preparing the outdoor pad: Technicians will level the ground and place a fresh, durable composite condenser pad. They will install vibration-absorbing isolation pads under the new unit to keep operating noise to an absolute minimum.
  • Mounting the indoor coil: The new evaporator coil is mounted directly to your furnace or air handler cabinet. The connections are sealed tightly to prevent any air leaks.
  • Running new line sets: While some installers cut corners by reusing old copper refrigerant lines, high-quality installations always utilize brand-new copper line sets. This prevents old contaminants and incompatible oils from ruining your new compressor.
  • Electrical and drain lines: The technicians will run new electrical whip wiring, install a new outdoor disconnect box for safety, and run a fresh condensate drain line to ensure water is safely carried away from your home's foundation.

How these components are fitted together directly impacts the longevity of your system. You can learn more about this by reading about How Proper AC Installation Affects Long-Term Performance.

System Testing, Commissioning, and the Final Walkthrough

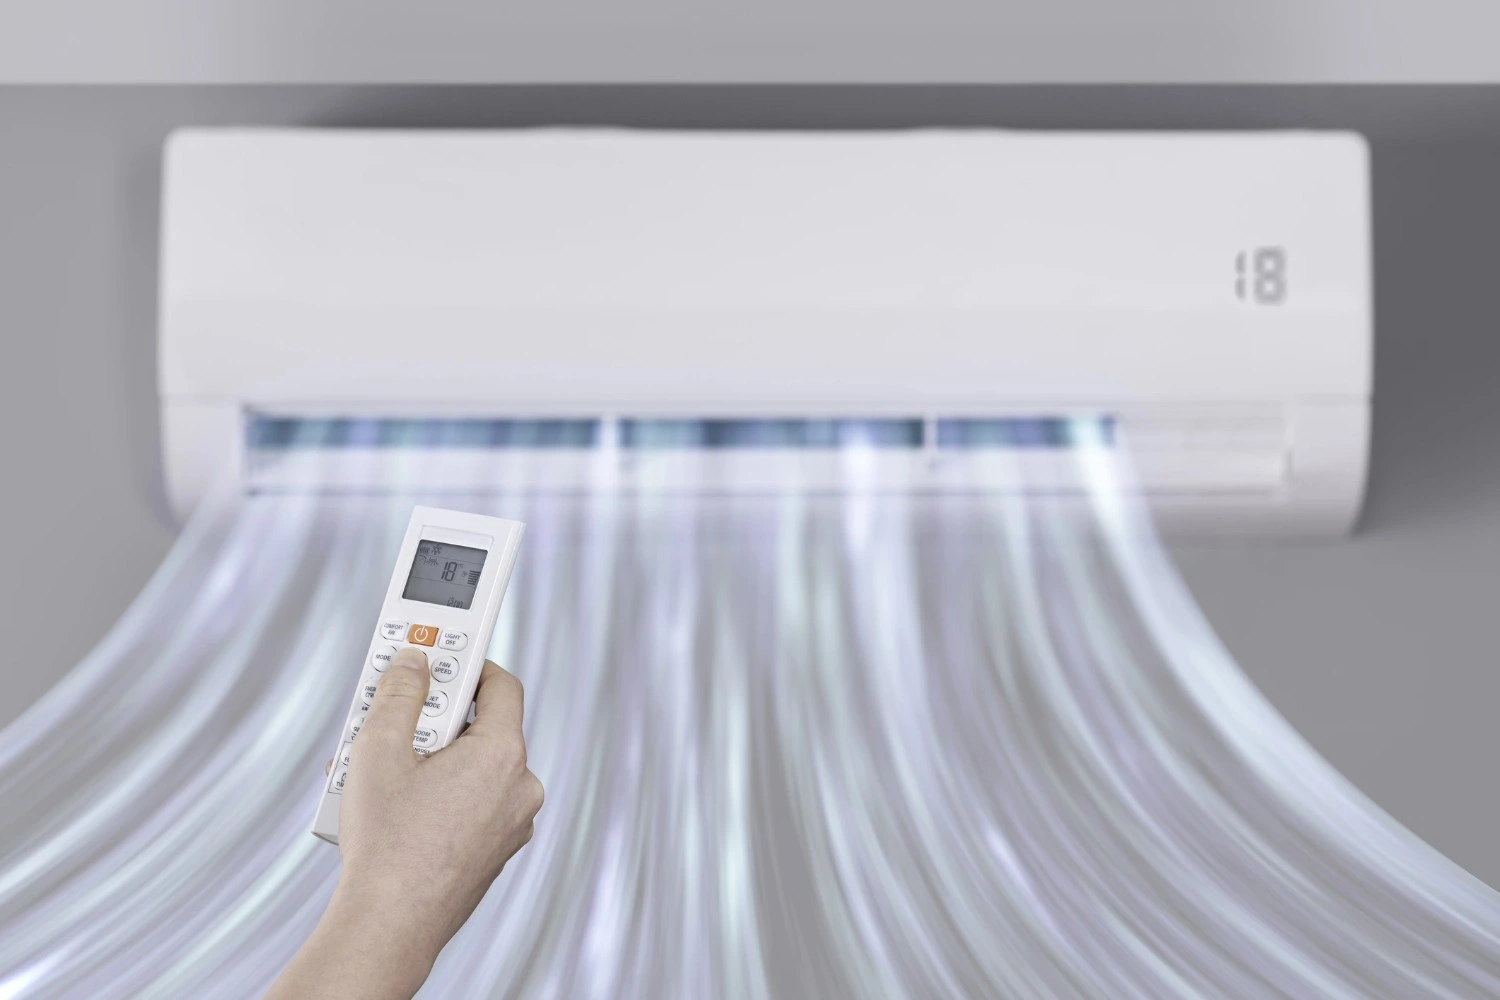
Once the physical units are securely mounted and connected, the job is far from over. A premier installation requires rigorous testing and calibration.

Before we declare the job complete, we run a series of system startup procedures to verify that your new air conditioner is operating exactly to manufacturer specifications. If you noticed Signs Your AC Needs Repair Before Kansas Summer and chose to replace it instead, this testing phase ensures you won't have to worry about those old cooling issues returning.

Verifying Performance Metrics and What to Expect During AC Replacement Testing

The testing phase is where true technical expertise shines. You should expect your installation crew to perform the following checks:

  • Nitrogen pressure test: Before adding any refrigerant, we pressurize the system with dry nitrogen to verify that every brazed copper joint is 100% leak-free.
  • Deep vacuum evacuation: We use a specialized vacuum pump to pull the system down to a minimum of 500 microns. This removes all trace moisture and non-condensable air from the lines, which is vital for preventing internal acid formation and premature compressor failure.
  • Refrigerant charge calibration: We release the factory charge and carefully add any additional refrigerant required for your specific line set length, measuring subcooling or superheat to guarantee the perfect charge.
  • Static pressure and temperature split: We measure the static pressure within your ductwork and verify the "temperature split" (or Delta T). A healthy, properly operating system should show a 15°F to 20°F difference between the air entering the return vents and the air blowing out of your supply registers.

For homeowners booking an AC Replacement Andover KS, we provide these documented measurements to prove your system is running at peak efficiency from day one.

The Homeowner Walkthrough and Warranty Registration

Once the system is running beautifully, the lead technician will conduct a final walkthrough with you. During this time, we will:

  1. Show you how to operate your new thermostat and set up any smart scheduling features.
  2. Point out the location of your indoor air filters and demonstrate how to change them.
  3. Explain how to spot potential condensate line blockages.
  4. Provide you with all the physical equipment manuals and documentation.
  5. Walk you through the warranty registration process. Registering your new Trane or Daikin system within 60 days of installation is crucial, as it often extends your parts warranty from a standard 5-year base warranty to a robust 10-year registered warranty.

Managing Disruption: Noise, Dust, and Cooling Downtime

An AC replacement is an active construction project inside your home. While we work hard to keep our workspace clean and quiet, some temporary disruption is normal.

Project TypeAverage DowntimeExpected Noise LevelDust & Disruption
Standard AC Replacement4 to 8 HoursModerate (drilling, brazing, metal fabrication)Minimal (contained to immediate unit areas)
AC Replacement with Duct Modifications1 to 2 DaysModerate to High (sawing, duct cutting)Moderate (some drywall/attic dust)
Full HVAC System Overhaul (AC + Furnace)2 to 3 DaysModerate to High (full removal & electrical)Moderate (contained with drop cloths)

Because your system will be completely offline for several hours, your home's indoor temperature will naturally rise during the installation window. To keep your family comfortable during a hot Wichita summer day:

  • Keep all exterior doors and windows closed as much as possible before the crew arrives to "trap" the cool air inside.
  • Close your blinds, drapes, and shades to block out direct sunlight.
  • Utilize ceiling fans and portable floor fans to keep air moving, which makes the indoor air feel several degrees cooler.
  • Plan to run errands, visit a local park, or spend the warmest afternoon hours in a cool, air-conditioned public space if you or your family members are sensitive to the heat.

Frequently Asked Questions About AC Replacement

How long does a typical AC replacement take?

A standard residential split-system AC replacement typically takes 4 to 8 hours to complete. If your home requires extensive ductwork modifications, zoning upgrades, or electrical panel replacements, the timeline can extend to 1 or 2 days. A full HVAC system replacement (installing both a new furnace and a new air conditioner at the same time) generally takes 2 to 3 days.

Do I need to leave my home during the installation?

No, you do not need to leave your home. Most homeowners choose to stay home and go about their normal daily routines. You will just need to be present for the initial morning walkthrough so we can review the plan, and again at the end of the afternoon for the final walkthrough and system demonstration.

Should I replace my furnace at the same time as my AC?

If your furnace is over 12 to 15 years old, it is highly recommended to replace both units at the same time. Installing a matched system saves you significantly on labor costs, ensures that the indoor blower motor is perfectly paired with your new outdoor AC for maximum SEER2 efficiency ratings, and allows you to manage a single, unified warranty for your entire home comfort system. If you are planning an AC Replacement Derby KS, our team can evaluate your furnace during your AC consultation to help you make the most practical choice for your home.

Conclusion

Understanding what to expect during AC replacement takes the mystery out of installation day and sets you up for a lifetime of reliable, energy-efficient home comfort. By preparing your home ahead of time, knowing the technical steps to watch for, and ensuring your system is fully tested and registered, you can confidently navigate the entire process from start to finish.

With nearly 60 years of family-driven experience, our team at Kelley & Dawson Service is proud to provide Wichita and the surrounding communities with meticulous care, cleanliness, and certified Trane and Daikin quality. If you are ready to upgrade your home comfort before the next major heatwave, explore our professional AC Replacement Wichita KS services and contact us today to schedule your comprehensive home evaluation!

Other Blogs
Reviews

hear what our satisfied clients have to say

“We've been doing business with Kelly and Dawson Service for a long time, and they’ve always been fantastic to work with. Most recently, our AC went out on a Sunday right when we needed it most. We called Kelly and Dawson, and within just 30 minutes, their technician Caleb showed up at our door. He was friendly, knowledgeable, and had the issue diagnosed and fixed within an hour.

We couldn’t have asked for better service, especially on a weekend. Highly recommend this company and their awesome technicians. Whether it's routine maintenance or an emergency repair, they’ve always come through for us.”
Jacob S
Our AC went out late on a Friday night. Kelly & Dawson were there first thing Saturday morning. The gentlemen was polite, very experienced, and had us back up and running in 30 minutes. The service fee was reasonable as well. I would recommend them in a heartbeat!
Captain M
They checked my furnace and got it all ready for winter. Very courteous and professional. An excellent company with outstanding customer service. I highly recommend them for all your heating & air needs.
Stacy S
This company is so great. Bought a new central ac unit a year ago. Today was the first maintenance/check up day and Daniel came out. From the beginning of buy the unit, the communication with everyone at Kelley and Dawson has been great right up to this morning when Daniel checked and cleaned the ac. Efficient, friendly....this company reminds me of living in small town with wonderful people when you need service.
Susan L
We've been using Kelley & Dawson Service for 5 years now and they've been wonderful every single time. Caleb is super kind, polite, and really professional. They always take great care of us – highly recommend!
Christina L
We’ve used them in the past for a new furnace and have not had any issues to date We called them out this past Saturday when our AC went out. The initial caller let me know a technician would be calling me. When Daniel called he let me know he had a couple clients before me and then would be out. He called again to let me know he was on his way. Daniel was respectful and found the problem quickly. Very affordable for an emergency call, part and labor. Thank you for the great communication and prompt service!
Anna H
john’s journey with us
1:34 min
financing Available

Financing with
Wells Fargo

Buy today, pay over time with the Wells Fargo Home Projects Credit Card¹, issued with approved credit by Wells Fargo Bank, N.A., an Equal Housing Lender. With approved credit from Wells Fargo, you’ll enjoy:

Today. Convenient monthly payments available.²
Flexible financing options
Easy online account management

Plus, by taking advantage of financing, you won’t use up your existing funding sources, like a home equity line of credit, other credit card or bank account.  They’ll still be available when you need them.
Please contact us to find out which financing options are available to you, or to learn about special financing promotions.

¹ Subject to credit approval. Call for details.
² The [Card Name] credit card is issued with approved credit by Wells Fargo Bank, N.A. Ask for details.

Short Heading Goes Here

Sed iaculis aenean sit sed risus arcu vitae integer elit.
Guide
5 min read

How to Succeed at What to Expect During AC Replacement, Even if You've Failed in the Past

Guide
5 min read

The Complete Guide to Mini Split Maintenance for Kansas Homeowners

Guide
5 min read

Is an AC Maintenance Plan Worth It for Your Home in Wichita?